v2.1 September 2023
© Secure Design Ltd.
Overview
EnCloak makes high-grade file encryption easy for everyone. Connect to any computer and securely encrypt/decrypt/hide documents for personal or shared team use.
EnCloak is a unique hardware platform enabling secure transfer of data between connected parties without any requirement for software installation or cloud services. Across the entire product range, EnCloak provides a new level of data protection whilst being exceptionally simple to use.
Dedicated, highly-secure devices are used to create an Encrypted Transfer System between remote users free from backdoors, key exchange or snooping. Files encrypted on EnCloak may be transferred to recipients via any direct or indirect method, safe in the knowledge that the encryption cannot be compromised.
When initially connected to any computer it appears to be a normal flash drive (1GB), but after your credentials are entered (in a unique way) the drive will re-attach revealing an additional hidden partition, which is used for AES-256 file encryption and decryption through drag and drop operations.
Whilst EnCloak CONNECT may be used by an individual to securely encrypt personal files that are stored externally, the real power lies in the ability to form a group of CONNECT devices. EnCloak CONNECT is primarily intended to facilitate transfer and sharing of encrypted documents amongst a small group for whom privacy is paramount. Each group member requires a CONNECT device. Files encrypted by a CONNECT device may only be decrypted by the original device or others within the EnCloak Group - permitting files to be securely transferred between two parties via any method (flash drive, email, cloud service, …).
CONNECT is not a storage device – no sensitive files are retained once unplugged. And no software needs to be installed; everything is managed though familiar file operations.
Hardware
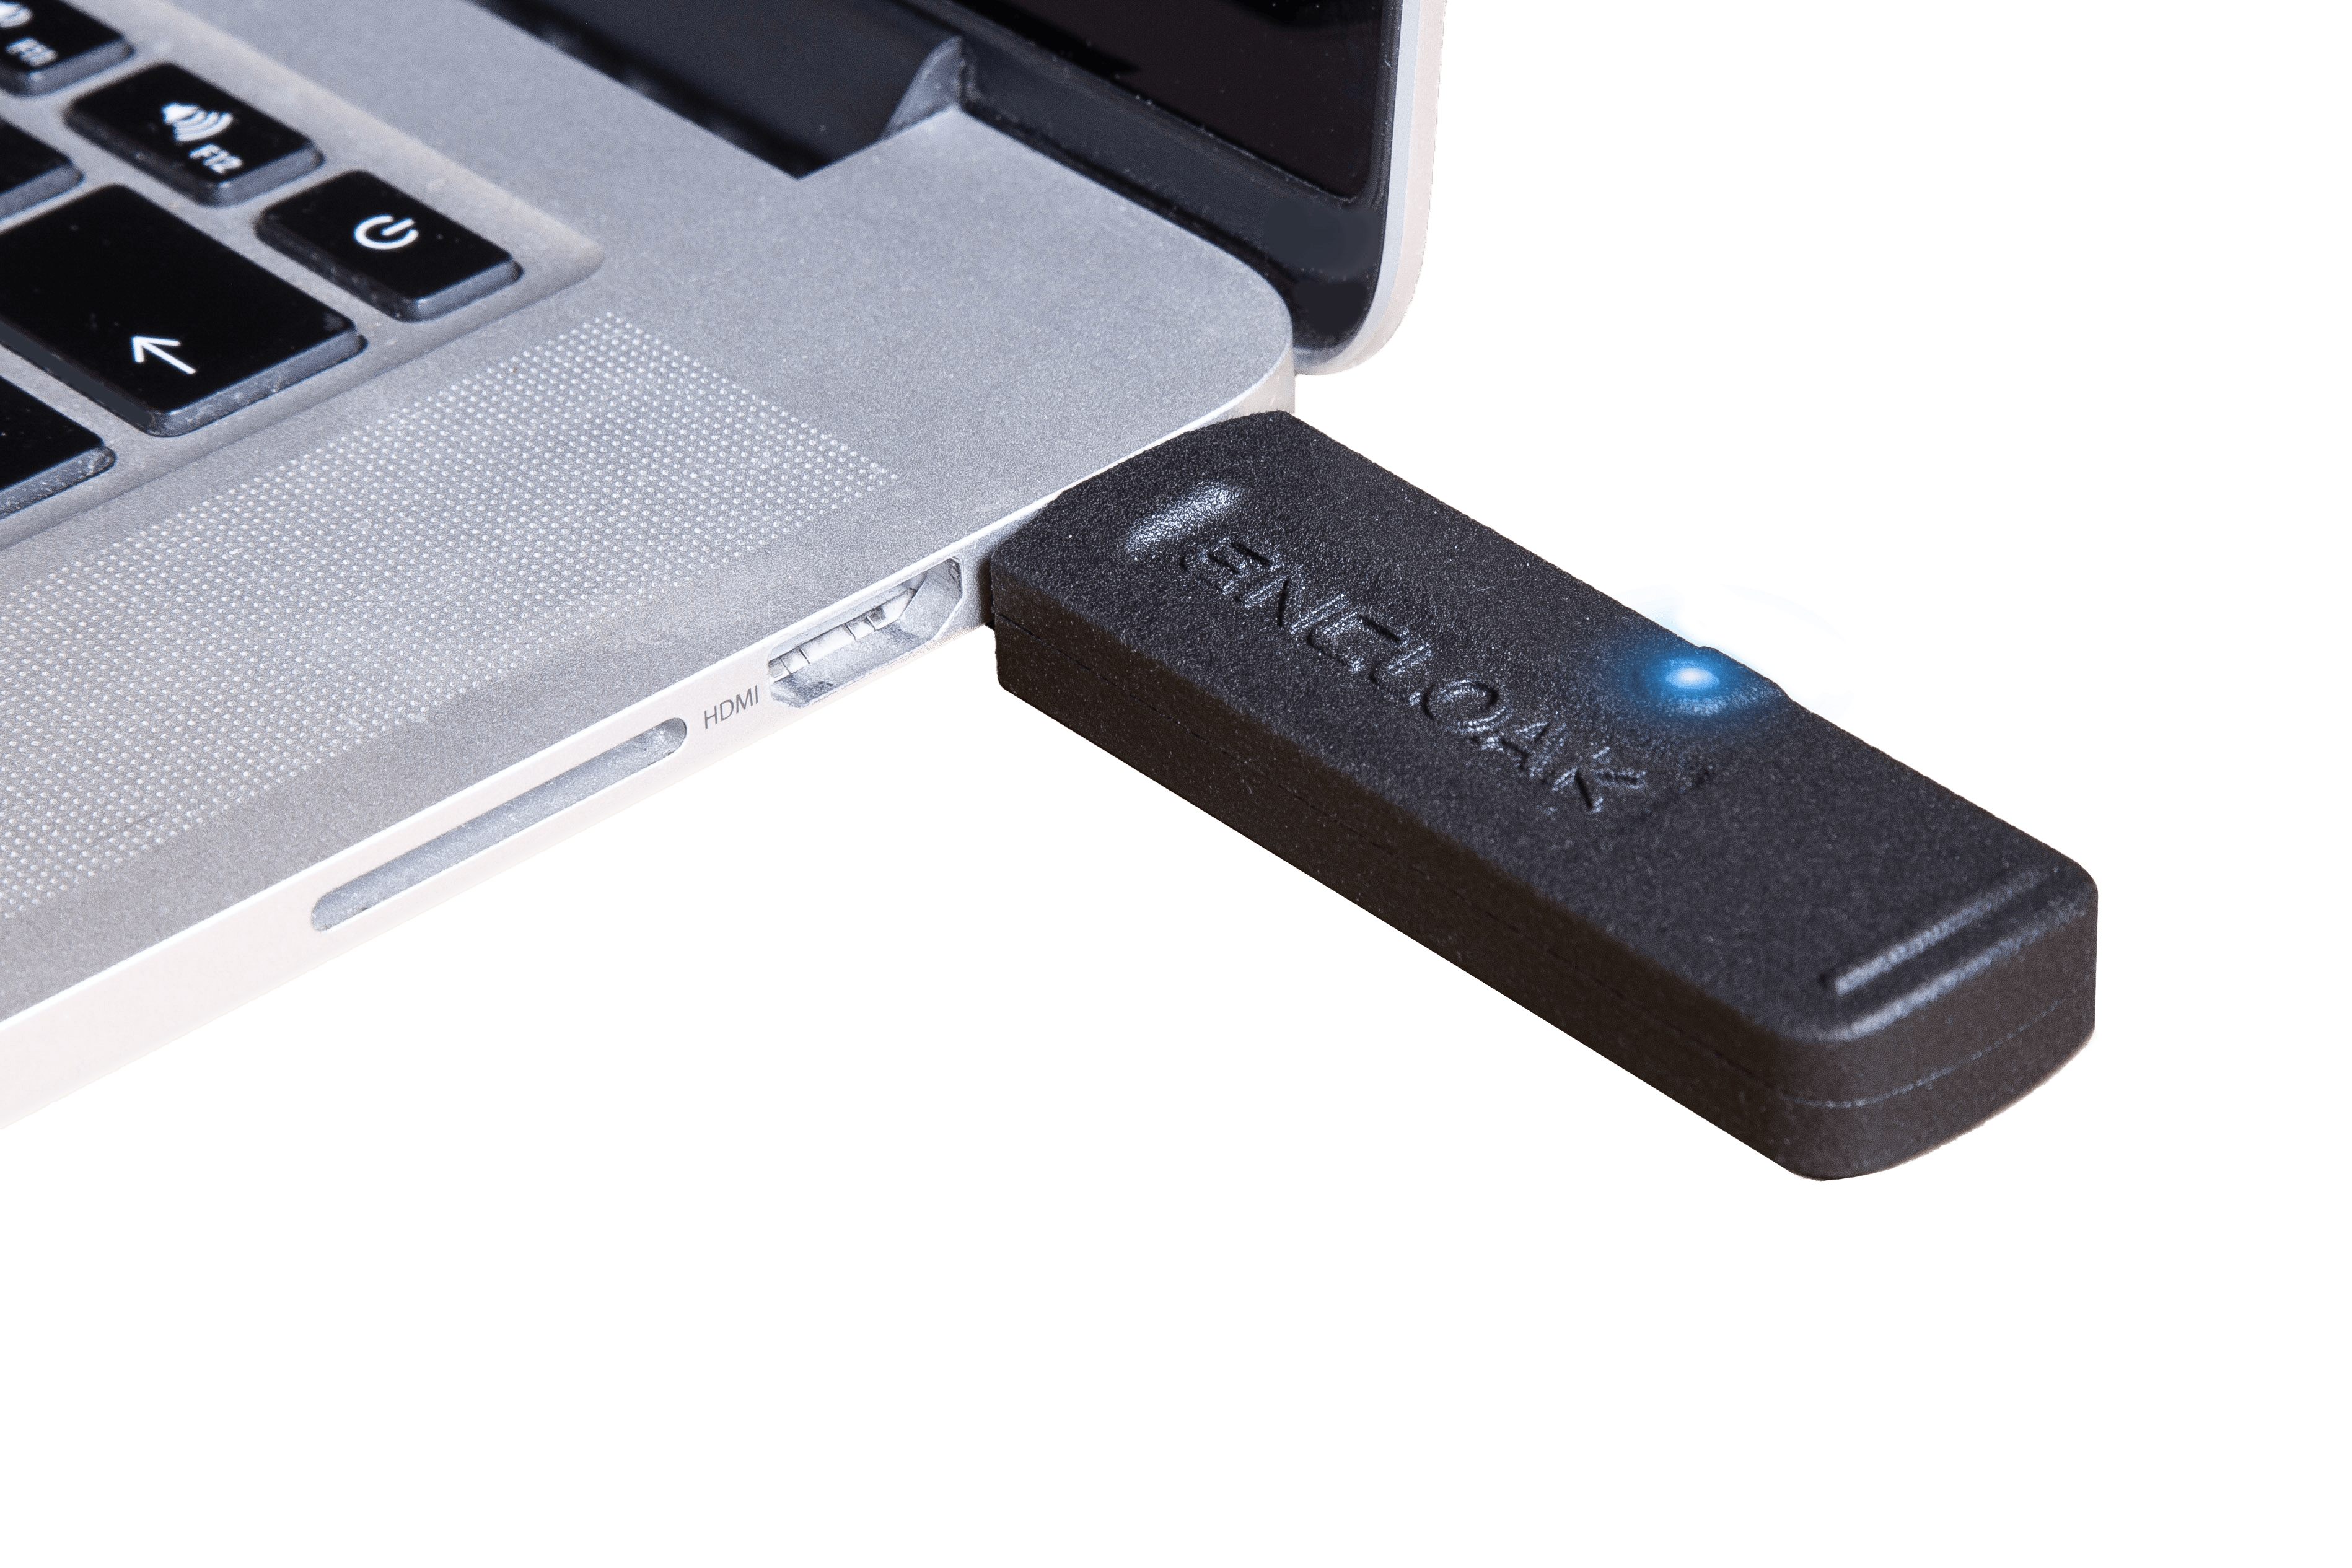
EnCloak CONNECT is a dedicated USB device
Operation Mechanism
No software or drivers are required to operate EnCloak CONNECT.
When first plugged in it will present itself as a small, entirely usable, 1GB flash drive. This Decoy drive is intended to hide the real purpose of the device. To change the operation mode, and reveal its full functionality, credentials need to be entered in a unique manner.
Everything is carried out through file operations familiar across all operating systems; such as drag and drop, copy, delete and rename. Certain sequences of these operations have to be followed to access or configure the device, and encrypt or decrypt files.
The most important operation utilised by EnCloak is Drive Eject. This is used to instruct the device to accept user credentials, commence encryption, decryption, or apply configuration changes. After completion, EnCloak will re-attach itself with encrypted/decrypted files available or configuration/access changes applied.
Most operating systems offer similar methods to eject Mass Storage devices. The recommended ways to eject an EnCloak device under Windows 11 are illustrated below.
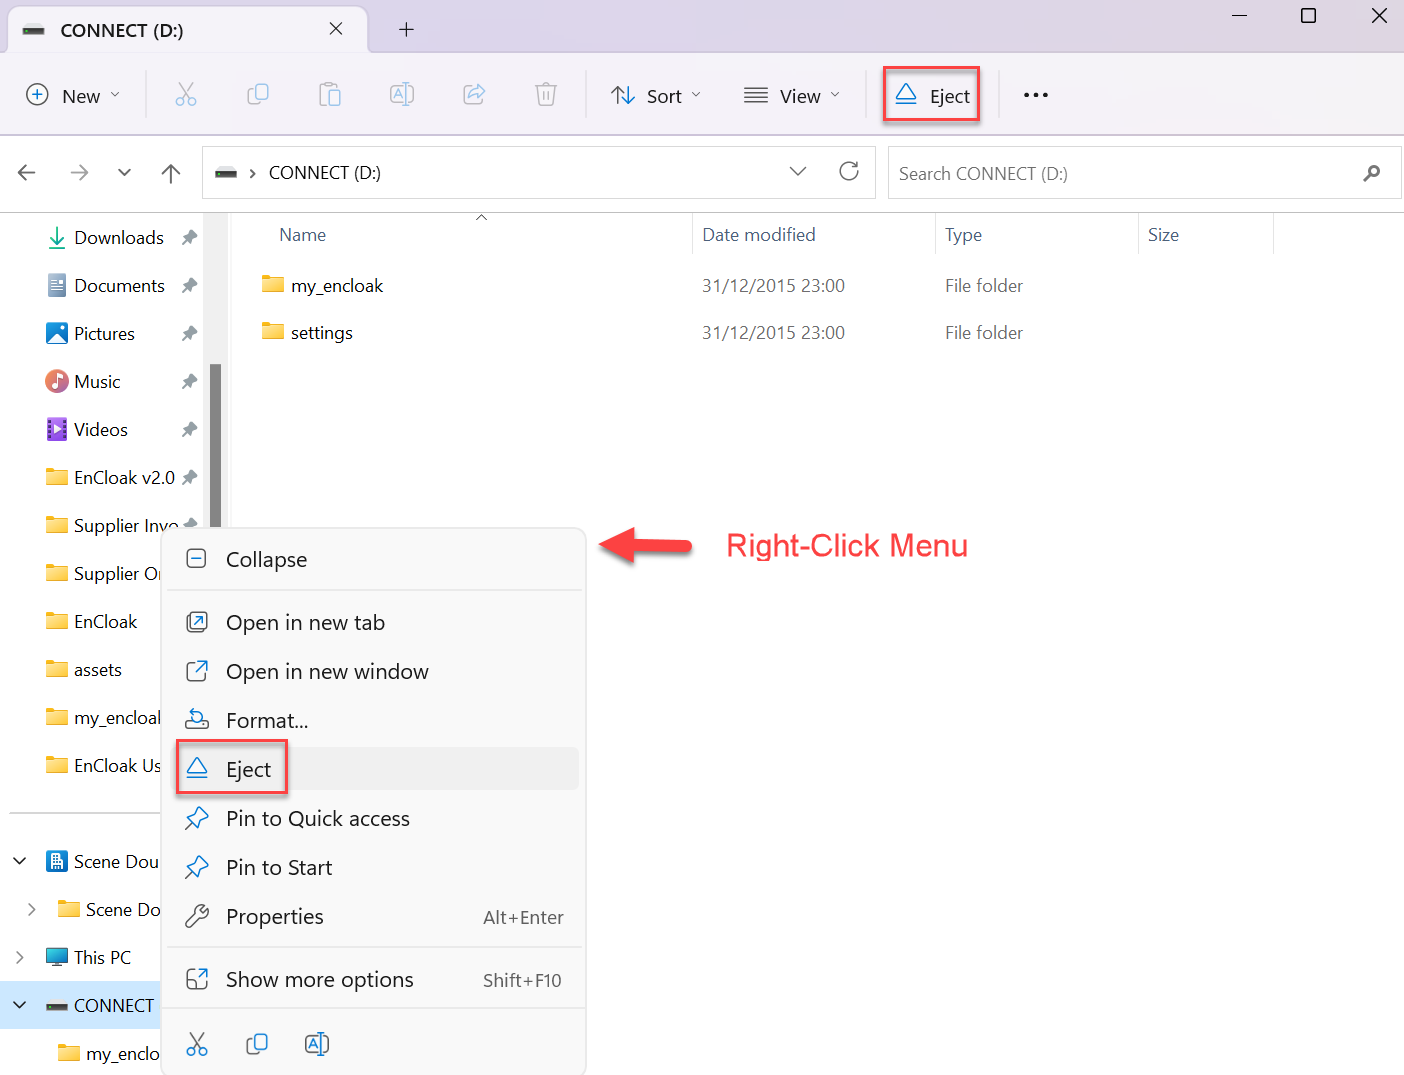
When using LINUX you need to be careful to select Eject rather than Unmount. Under some distributions the eject icon actually performs an unmount which will lead to the drive needing to be re-plugged and any pending operations ignored. Right-click to ensure you choose eject.
Status LED
EnCloak CONNECT’s Status LED is used to convey the following information:
-
EnCloak Model
-
Operating Mode
-
Activity Indication
-
Ejection Status (ok to remove)
| LED Colour or Activity | Status |
|---|---|
Purple |
Device is an EnCloak CONNECT and in Decoy Mode |
Blue |
Device is in Connect Mode |
Red |
Data being written to device |
Green |
Data being read from device |
Off |
Device is totally ejected and safe to remove |
Flashing SOS Repeatedly |
Device is being factory reset |
Operation Modes and First Use
In this section we describe operating modes and how to initialise your EnCloak CONNECT.
Decoy Mode
When first plugged in to your computer, EnCloak will appear as a 1GB disk drive named ENCLOAK.
The device is in Decoy Mode, appearing to be a standard drive to disguise its real purpose if lost or stolen. This is a real (unencrypted) drive on to which files may be permanently retained. You’ll find this User Guide (HTML & PDF), for example, pre-loaded on it.
| For security, and to best act as a Decoy, we strongly recommend replacing the pre-loaded User Guide folder with a few inconsequential files on the Decoy drive. |
To access EnCloak’s true functionality, user credentials need to be entered in a unique manner to switch the device into Connect Mode.
Connect Mode
You must be in Connect Mode to use EnCloak for file encryption and decryption.
To enter Connect Mode your credentials are entered (not created) using the following scheme:
-
Create a text file with a previously preset name (it does not have be *.txt, but it must be a text file).
-
Using a text editor, enter the previously preset passphrase on the first line of the file and then save it.
-
To proceed, EnCloak must now be ejected (see Operation Mechanism).
Please note that the credentials consist of both the name of the password file and the passphrase within it.
-
If the credentials are accepted, EnCloak will then re-attach in Connect Mode with a partition named CONNECT, and the password file will not be retained on the Decoy partition.
-
If the credentials are incorrect, EnCloak will not re-attach. A correctly named password file will never be retained on the Decoy partition (when EnCloak is reconnected) - whether or not it contains a correct passphrase; but an incorrectly named password file is permanently retained (just like any other file) - be careful.
The factory default credentials are:
Password Filename |
password.txt |
Passphrase |
password |
To secure your device you must set your own credentials (see First Use).
|
Under Windows, it is a good idea to set File Manager to show file name extensions to ensure the password file is named correctly: File Manager > View > Show > File name extensions There is a configuration setting (see Other_Settings) which determines whether both the Decoy & Connect partitions are mounted in Connect Mode or solely Connect. The default is to have only Connect visible. Do not change this setting if using MacOS. |
An example of default password entry in Windows is shown in the animation below:
After entering Connect Mode the following two folders are available on the CONNECT partition:
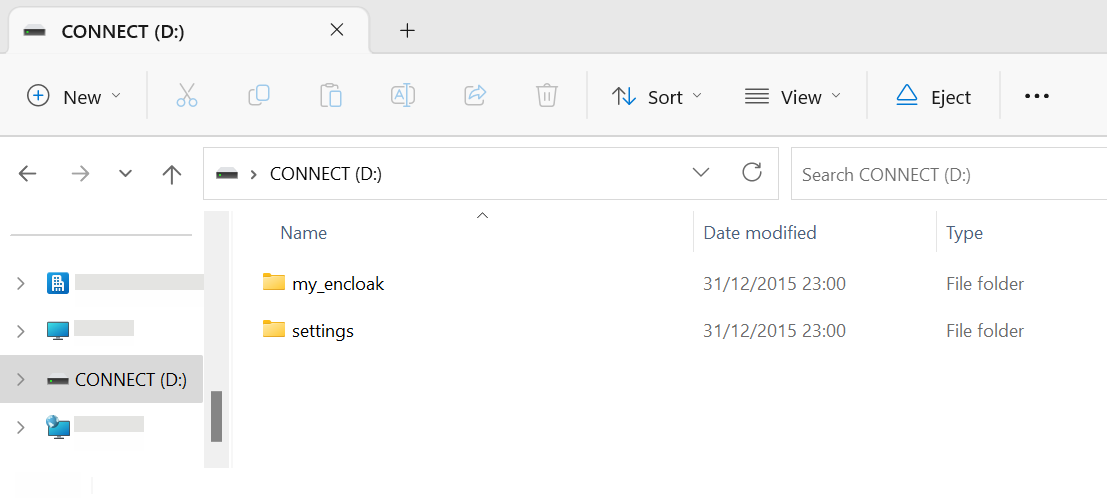
| Folder Name | Description |
|---|---|
my_encloak or my_group |
Drag or copy files to be encrypted or decrypted to this folder |
settings |
For EnCloak CONNECT configuration and group management |
First Use
Ensure you retain a copy of the User Guide folder initially provided on the Decoy Drive because it will be wiped during Factory Reset.
To fully secure your device we strongly recommend you carry out the following initial operations:
-
Factory Reset to generate a new set of device and encryption keys. (see Factory Reset for details).
-
Then change the default password file name and passphrase to create your own unique credentials: (see Password Management for details).
Following Factory Reset, you should re-enter the default password in order to enter Connect Mode. You may then change the password.
Credentials are intended to be manually re-entered each time you use the device. For convenience (but at the expense of security) you could instead keep the password file hidden on your machine (or externally) and simply drag it on to your EnCloak device when required (followed by eject). If you do this, we recommend that you obfuscate the file by naming it to look like a different type of file; for example, myimage.png, even though it’s still a text file. DO NOT be tempted to store the password file hidden within a folder on the Decoy Drive! Alternatively, for enhanced security, consider naming the stored, obfuscated, password file differently to that specified for the credentials to which you use must change it whenever it is dragged onto the EnCloak device. i.e., the stored file named myimage.png is renamed mypasswordfilename (which you have memorised).
Drive Names
The default Decoy & Connect Partitions (ENCLOAK & CONNECT) may be permanently renamed as follows:
-
In most file managers, simply right-click on the drive. A rename option should be available in the menu.
-
To apply the name change EnCloak must now be ejected as previously described (see Operation Mechanism). EnCloak will then reattach with the volume renamed.
AutoPlay
Most operating systems can be set to automatically open a file manager window whenever a removable drive is inserted (e.g. Windows' AutoPlay). This is very convienient for use with EnCloak - where the device is frequently ejected and remounted. If you have AutoPlay disabled, or the drive Window does not appear, simply use your file manager to open the ENCLOAK or CONNECT partition.
The animated examples in the guide all make use of AutoPlay.
EnCloak Configuration
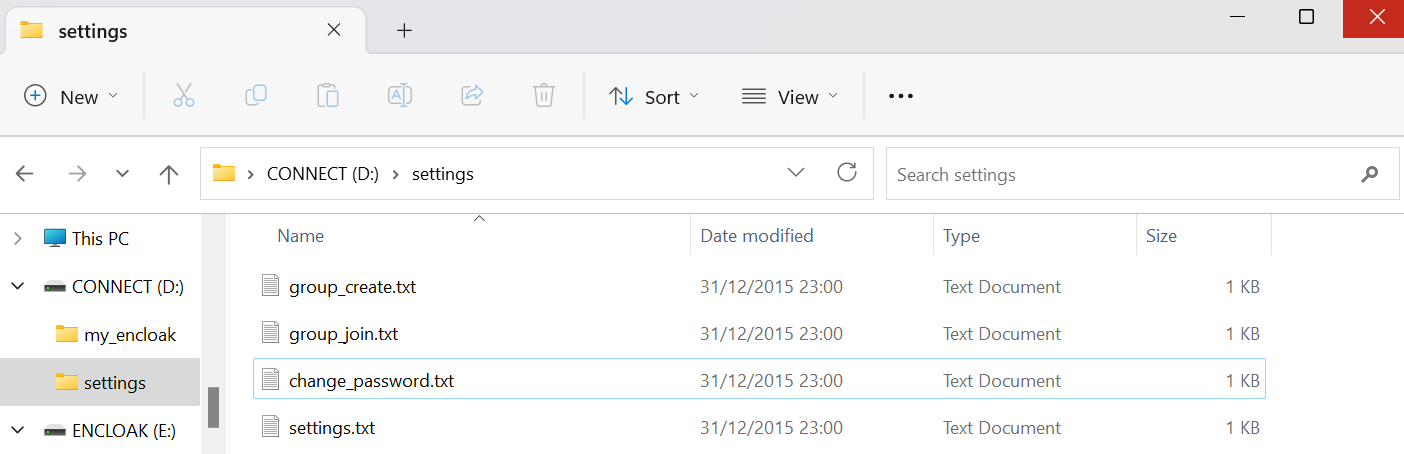
The settings folder contains several files for device configuration and management as described in the appropriate sections of this guide.
Encrypting Files and Folders
To securely encrypt files in Connect Mode:
-
Drag or copy the files or folders to be encrypted to the my_encloak or my_group folder. The copying process is complete when the Status LED ceases flashing red.
-
To initiate the encryption process EnCloak must now be ejected as previously described (see Operation Mechanism).
-
EnCloak will now commence the AES-256 encryption process during which the Status LED will flash red/green. This may take some time if file sizes are large or there are a lot of files.
-
Once complete, EnCloak will reattach with an additional completed folder where the encrypted content is available. The original (unencrypted) files are not retained on the device.
| Folder Name | Description |
|---|---|
completed |
Contains encrypted versions of the files just processed (denoted with an .sd suffix) |
my_encloak or my_group |
This folder is empty following the encryption process |
|
|
Handling Encrypted Files & Folders
Files that have been encrypted by EnCloak CONNECT are totally secure and may only be decrypted by the original or another grouped device. Encrypted files should be immediately copied from the device and safely stored locally, on another storage device, or in the cloud.
Obviously, it is inadvisable to store the original and encrypted versions in the same place. It is up to the user to risk assess whether the original unencrypted files should be retained.
Be sure to copy off encrypted files prior to encrypting any further files because the completed folder is erased on every eject cycle.
Remember: EnCloak is not a persistent storage device. Nothing is retained on the Connect drive once it is removed from a USB port.
Decrypting Files
Decryption follows an identical process to encryption.
To decrypt files:
-
Drag or copy previously encrypted files/folders (denoted with an .sd suffix) to the my_encloak or my_group folder. The copying process is complete when the Status LED ceases flashing red/green.
-
To initiate the decryption process EnCloak must now be ejected as previously described (see Operation Mechanism).
-
EnCloak will now commence the AES-256 decryption process. This may take some time if file sizes are large or there are a lot of files.
-
Once complete, EnCloak will reattach with an additional completed folder where the decrypted content is available. The original (encrypted) files are not retained on the device. .
| Folder Name | Description |
|---|---|
completed |
Contains decrypted versions of the files just processed |
my_encloak or my_group |
This folder is empty following the decryption process |
Using EnCloak CONNECT as a Standalone Device
A single EnCloak CONNECT device may be used to secure sensitive files stored locally or in the cloud. There is, however, a risk of data loss if the device is lost or fails. To guard against this scenario, we recommend that an additional (grouped) device is retained in a secure location as a backup.
Using Multiple EnCloak Devices as a Group
The real power of EnCloak CONNECT lies in the ability to group multiple devices together in order to facilitate an Encrypted Transfer System between multiple EnCloak users. Any member of the group may encrypt files to securely share with other members.
-
Each EnCloak CONNECT device may be a member of just a single group.
-
Devices are added to the group through secure encrypted invitation files.
-
Members may be added to a group but not deleted. If members need to be removed, a new group should be created for the remaining members (inaccessible for previous members).
Group Creation
The initial step is to create a group using one of the EnCloak CONNECT devices to be grouped (usually that of the group administrator)
Within the settings folder is a text file named group_create.txt:
-
Open this file with a text editor and enter a passphrase for the group within the quotes as directed.
-
The group passphrase must be at least 16 characters long and should be different to your EnCloak CONNECT passphrase. Make a secure note of this passphrase.
-
Save the file and eject EnCloak as previously described (see Operation Mechanism) to create your group.
-
Once re-attached, an encrypted group invite (invite.sd) is immediately available for use by other EnCloak CONNECT devices in order to join the group (see Group Invitation).
-
Your main encryption/decryption folder will have been renamed my_group to signify group membership.
| Once created, the group invite file is retained on your device the next three times it is plugged in. If devices are going to be added to a group over an extended period, or you wish to retain the invite for backup purposes, it should be copied from your EnCloak device and securely retained. The invite is encrypted and requires knowledge of the group passphrase to use it. |
Group Invitation
After creating a group, use the following procedure to apply the encrypted invite to all EnCloak CONNECT devices joining the group:
-
Copy the invite.sd file into the settings folder.
-
Within the settings folder is a text file named group_join.txt. Open this file with a text editor and enter the previously created group passphrase within the quotes as directed.
-
Save the file and eject EnCloak as previously described (see Operation Mechanism) to join the group.
-
Once re-attached, the main encryption/decryption folder will be renamed my_group (see Encrypting Files and Folders) to signify group membership.
The most secure method to apply invites is for the administrator (who created the group) to have physical possession of all the CONNECT devices and to follow the above procedure for each prior to discarding the invitation. Encrypted invitations may also be sent and applied to remote (possibly anonymous) devices, in which case the group passphrase should be communicated to a trusted party in a separate, secure, manner.
| Subsequent invitations should only be applied to a device if a new or replacement group is formed. The device will retain the ability to decrypt files of groups to which it previously belonged. |
Group Management
Please note the following in order to manage group members:
-
Members cannot be removed from a group - a replacement group must be created, and invitations applied for the remaining members. All members (including those removed) will retain the ability to decrypt previously encrypted files, but only members of the new group will be able to share files subsequently encrypted.
Because EnCloak devices are not administered by software or a cloud service there is no way to remotely delete a member from a group. This is not a security risk because the compromised member would presumably have already decrypted any data to which they had access! In the case of loss, whoever finds the device would need to know how to operate it and the credentials required - in addition to the location and ability to access any previously encrypted files.
-
The only way to add to members to the group is via the originally generated invite (see note in Group Creation section); otherwise a new group must be created
-
A device may revert to standalone operation (i.e. remove itself from a group) by setting the leave_group option within the group_create.txt file to '1', saving the file, and following the normal ejection procedure to apply the change.
| To maintain security it’s good practice to create a new group whenever there are personnel or other changes within your organisation. |
Encrypting Files & Folders for the Group
-
Files encrypted by any current group member may be decrypted by any other group members.
-
Each EnCloak CONNECT device retains the ability to decrypt any files for groups to which it previously belonged.
The process to encrypt or decrypt files for a group is the same as that for standalone use (see Encrypting Files and Folders).
Password Management
EnCloak Connect requires credentials to enter Connect Mode (see Connect Mode) in order to operate and manage the device.
Credentials are entered (but not created) through the following scheme:
-
Create a text file with a previously preset name (it does not have be *.txt, but it must be a text file).
-
Using a text editor, enter the previously preset passphrase on the first line of the file and then save it.
-
To proceed, EnCloak must now be ejected as previously described.
The factory default credentials are:
Password Filename |
password.txt |
Passphrase |
password |
The most important initial task should be to create your own unique credentials.
Within the settings folder is a text file named change_password.txt which is used to manage credentials.
-
Open this file with a text editor and make the required parameter changes as directed.
-
Save the file and eject EnCloak as previously described (see Operation Mechanism) to apply the credential changes.
| Change Password File Parameter | Description |
|---|---|
current_passphrase |
The current passphrase must always be entered to make changes except when re-enabling password checking (because in this case there is no current passphrase). |
new_passphrase |
Enter new passphrase. It may be long and complex. |
new_password_verify |
Re-enter new passphrase to verify. |
password_filename |
Rename password text file used to enter passphrase (including file type suffix - if used). Does not have be named *.txt but must be a text file. For obfuscation it could, for example, be a named myimage.png even though it’s a text file. |
disable_credentials |
Set to '1' to remove the requirement to enter credentials. Set to '0' to re-enable |
To maintain security we recommend you do not disable credentials. If you do so, but later wish to re-enable checking, a new password must be provided.
Other Settings
Within the settings folder is a text file named settings.txt where additional configuration options are set:
-
Open this file with a text editor and make the required parameter changes as directed.
-
Save the file and eject EnCloak as previously described (see Operation Mechanism) to apply configuration changes.
| Settings File Parameter | Description |
|---|---|
single_mount |
Governs whether the Decoy partition remains visible when in Connect Mode. '1' = Connect partition only (Default). '0' = Decoy & Connect partitions are both mounted. Only use the default setting with MacOS. |
keep_date |
This parameter governs the date & time stamp given to encrypted files. '1' = file has same date/time as original file. '0' = file is dated as 31/12/2015 @ 23:00 (default). |
Factory Reset
An EnCloak CONNECT device is reset to factory default state through the following procedure carried out in a similar manner, but instead of, password entry.
-
Create a text file named encloak_factory_reset.txt in the root of the Decoy partition.
-
Using a text editor, enter 'reset 1' on the first line of the file and then save it.
-
To proceed, EnCloak must now be ejected as previously described (see Operation Mechanism).
-
At this point the Status LED will blink SOS 20 times starting green and becoming more and more red. After this EnCloak CONNECT will be reset to factory default state and new random encryption keys created.
For security, reset to factory default is recommended prior to setting up your EnCloak CONNECT in order to generate a fresh set of random device and encryption keys.
Backup and Mitigation
If an EnCloak device is lost, fails or credentials are forgotten, it may prove impossible to decrypt important files. Whilst this could be highly desirable for a certain class of users, it would prove catastrophic for others. Some thought needs to be given to mitigation and recovery - depending on the absolute level of security desired and whether or not original (unencrypted files) are retained.
Please consider the following recommendations:
-
Make a note and securely retain both individual and group passphrase credentials. An independent EnCloak CONNECT device could be used to encrypt these.
-
Keep a copy of the encrypted group invitation file, invite.sd. This will enable future devices to be added to an existing group, or previously encrypted files to be accessed by standalone users who do not have a backup device. Even though the invite is encrypted it should, of course, be placed in a safe location!
-
For standalone users, create a group and apply it to a second EnCloak CONNECT device which is kept as a backup device in a secure location. If you do not have another device, then at least retain the secure invite as described above.
-
Create a new group whenever a member leaves the group. All members (including those removed) will retain the ability to decrypt previously encrypted files, but only members of the new group will be able to share files subsequently encrypted. Safely record any new user or group credentials.
-
If a secure invite is sent remotely then communicate the group passphrase via a separate means. The new member should be instructed to delete the invite following application.
-
Create a new group if there is any possibility that the secure invite and group passphrase have been communicated to an untrusted party. The most secure way to create a group is for the administrator (who created the group) to have physical possession of all the CONNECT devices when creating the group prior to discarding the invitation.
Firmware Upgrade
EnCloak CONNECT has a highly secure mechanism for firmware upgrades. Full instructions will be provided in the event your device requires an update.
Contact & Support
EnCloak has been developed by Secure Design Limited and incorporates patented technology.
Please contact us directly for any support or commercial information.
Secure Design Limited
7 Theobald Court
Theobald Street
Borehamwood
WD6 4RN
UK
Tel: +44 (0)208 191 9941
enquiries@secure-design.com
www.secure-design.com